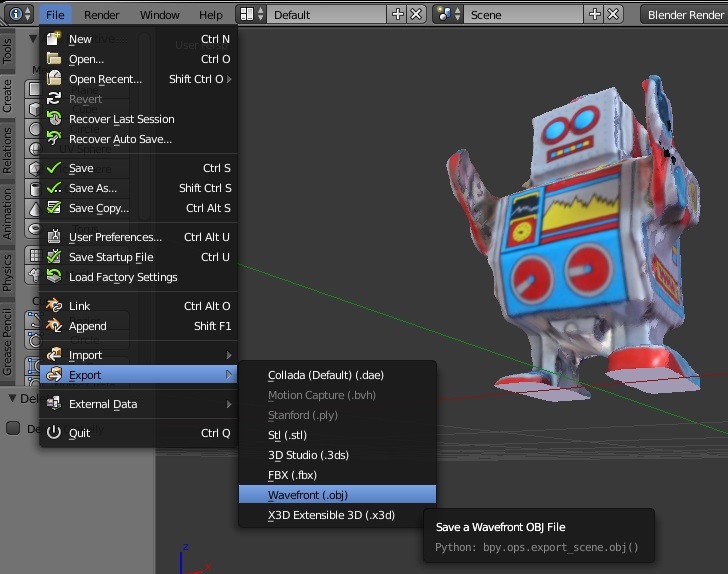
Postprocessing
3D model
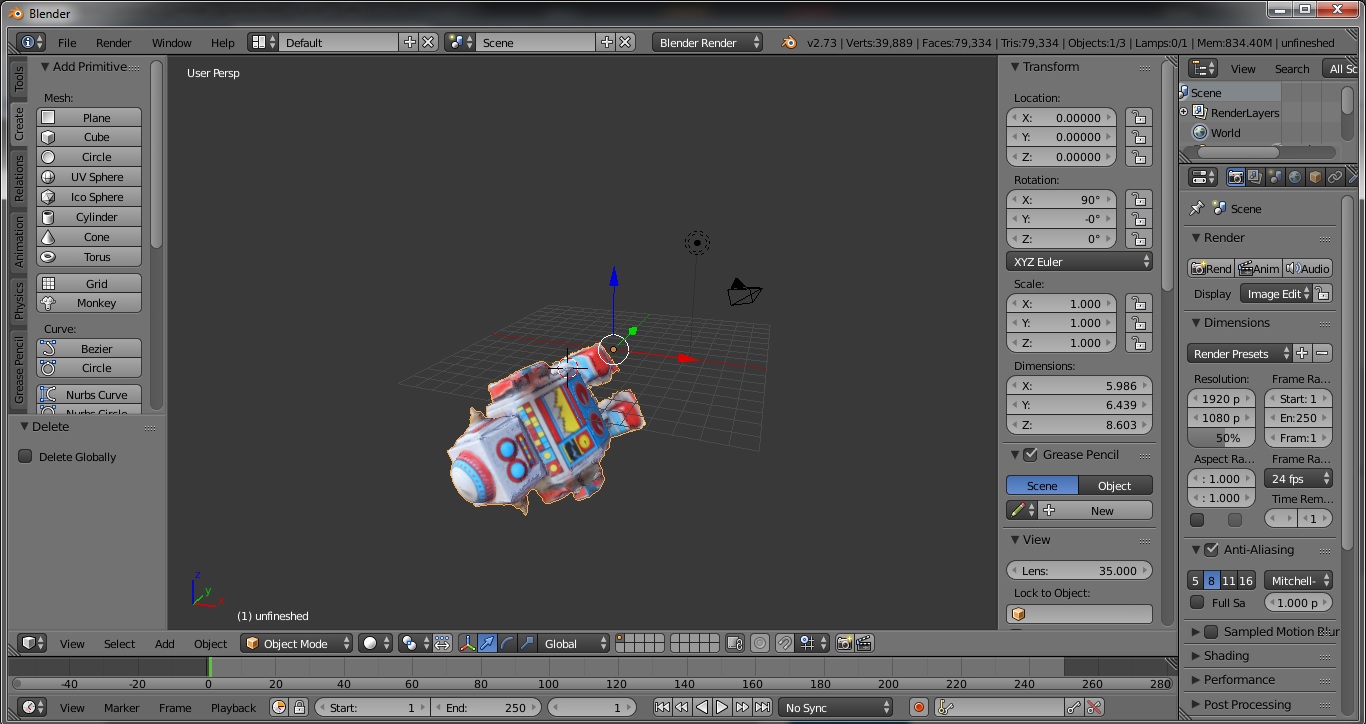
At this stage, the model has still a hole on the bottom side. Furthermore, it might not be aligned to a 3D reference frame and could have the wrong scale for your application. All these problems can be tackled with the open source 3D graphics and animation software Blender. If you are not accustomed to using Blender, it might be a good idea to read up on the navigation with help of keys. The following instructions are based on the Blender 2.73 version.

Adjust position
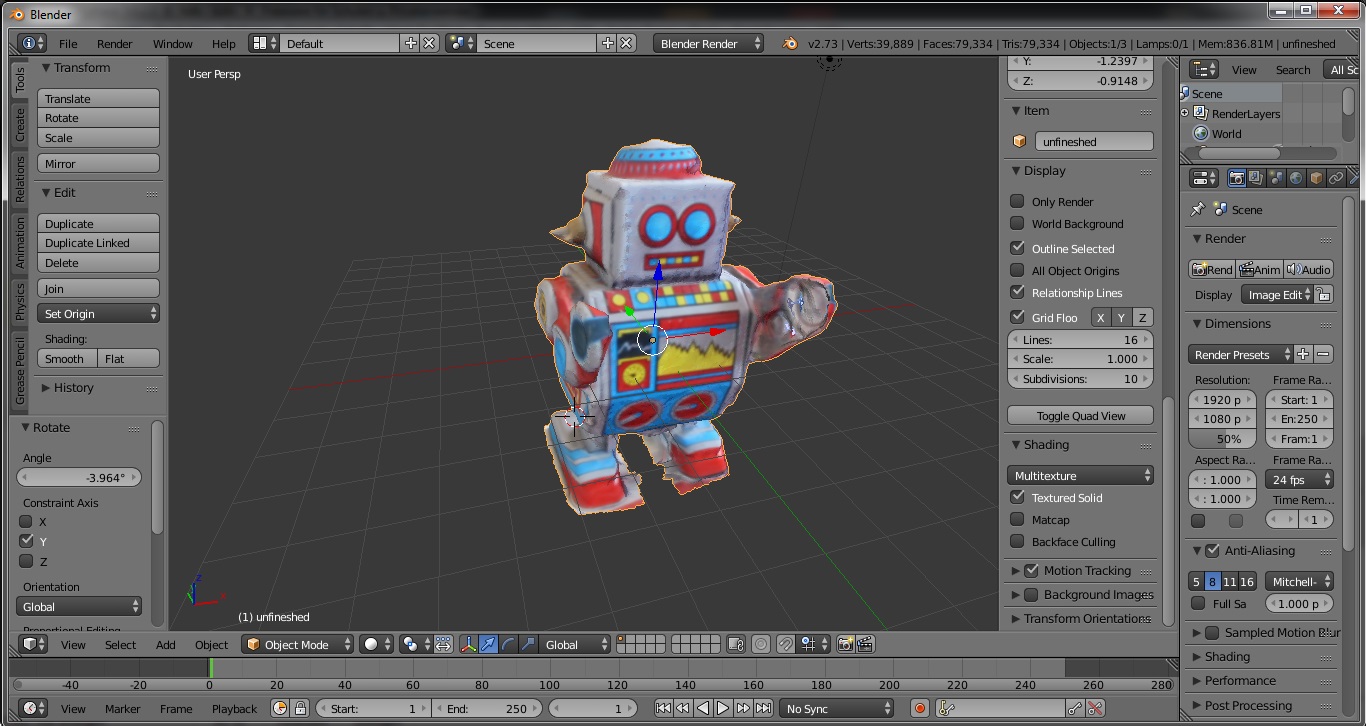
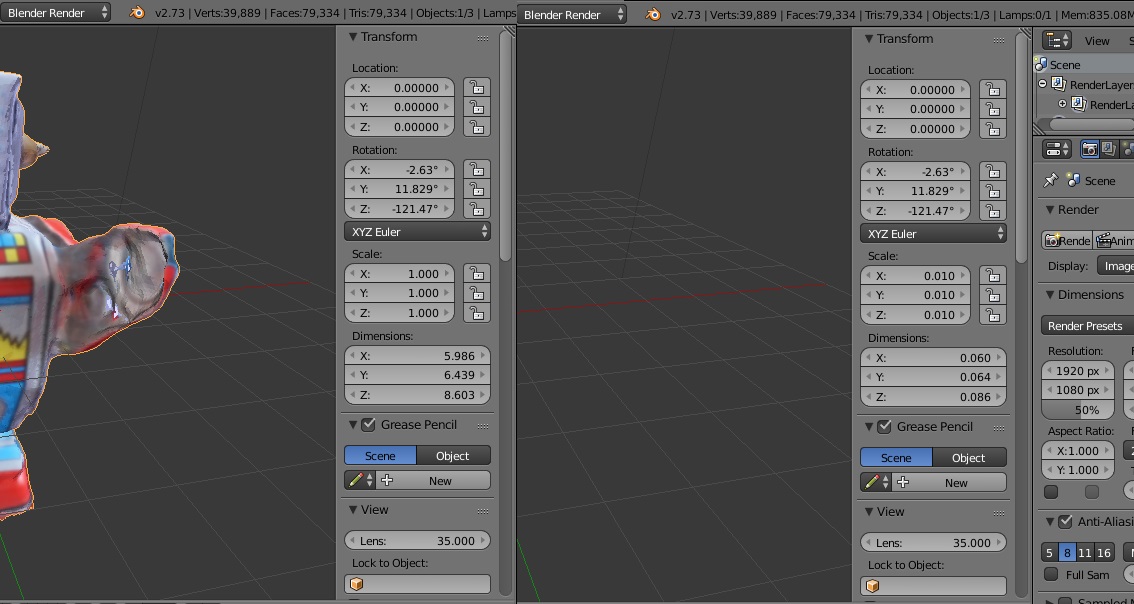
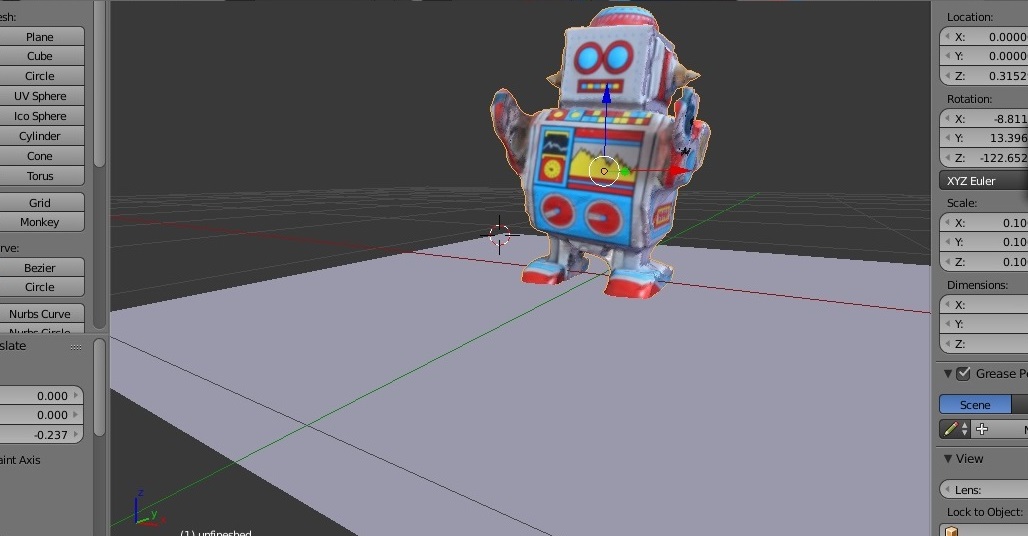
After importing the 3D mesh select the object with a right mouse click. In order to see the model with texture tick under "Shading" ➟ "Multitexture" ➟ "Textured Solid" in the toolbar on the right. In order to center the mass of the model around the origin, choose among the options under "Tools" ➟ "Set Origin". In the case that the model is not aligned to the 3D coordinate system, select it with a right mouse click. Press the "r" key and, depending on how you need to rotate, the "x", "y" or "z" key. By simple mouse movements, you can now adjust the mesh. The further the mouse cursor is away from the model, the smaller is the angle of rotation which allows fine adjustments. The keys "1" and "7" on the number pad change the view to "from above" and "from the front" respectively. This can be a good reference for the rotation process.
Scaling
At this stage, the scale of the model is encoded in cm. If you require a different scaling, change it accordingly under "scale" in the toolbar on the right. For example, ROS is using meter as unit of length, which results in scaling the object by a factor of 0.01.
Filling a hole
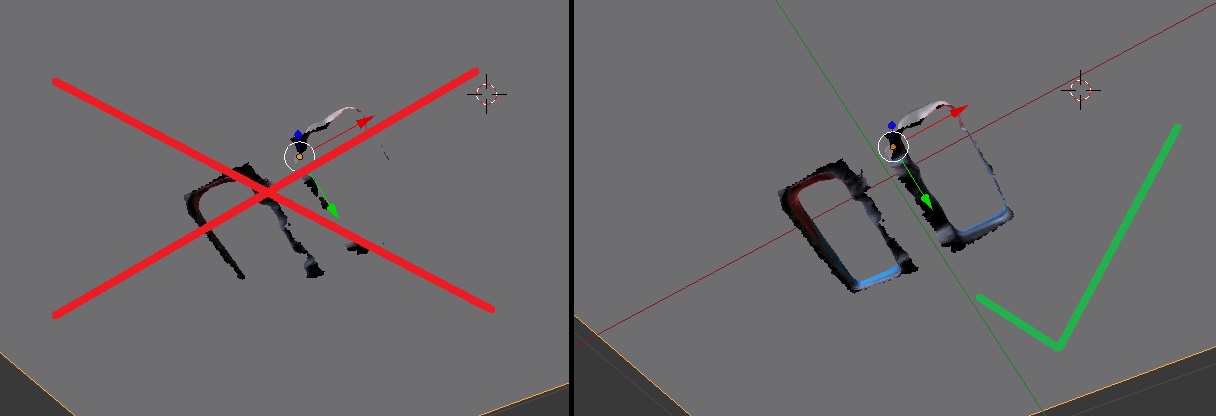
In order to fill a hole, we intersect the 3D mesh with a plane which cuts off the rough edges around the hole and fills it. For this, select under "Create" ➟ "Add Meshes" ➟ "Plane" and move the plane such that it covers the hole without removing too much of the original object. This can be a bit tricky. You might have to rotate either the object or the plane in order to find a good equilibrium. Make sure, that a closed edge around the hole is located below the plane. Otherwise, the intersection step will not work.
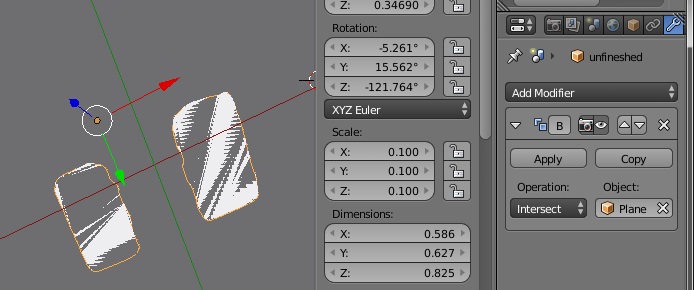
For the intersection, the normal vectors of the plane must be flipped. For this, select the plane with a right mouse click. Then change into "Edit mode" in the bottom toolbar. Press the "w" key and select "Flip normals" in the pop-up menu. Change back into "Object mode" and select your object with a right mouse click. In order to intersect, choose the screwdriver symbol on the very right and choose "Add modifier" ➟ "Boolean". Select the "Plane" as "Object" that you want to intersect with. If everything is done correctly, you will get a preview of the intersection. Otherwise, an error message will pop up and it is very likely, that the edge of the hole is not entirely covered by the plane. Fix it and try again. Otherwise, just confirm with the "Apply" button. Remove the plane by selecting it with a right mouse click and pressing the "delete" key.
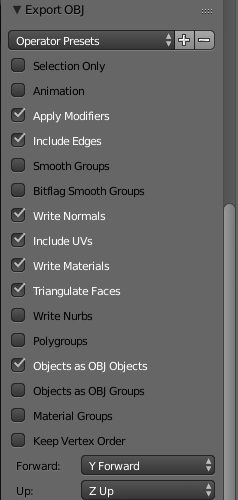
Export the 3D mesh again as an .obj file. You can change the orientation by indicating which direction is front and up, e.g. "Y Forward" and "Z Up". Tick "Write Normals" and "Triangulate Faces", export to your dream destination and with the correct name and you are done!